Live preview
Table of contents
- What is live preview
- Live preview features
- Requirements
- Set up live preview
- Set up advanced live preview features
- Known issues and limitations
What is live preview
Live preview allows users to preview their content in real time in the same page with the entry editor. As changes to the content are made, they are immediately reflected in the preview pane.
Live preview features
Live preview comes with the following features:
- Side-by-side previewing and editing — Edit your entry and preview changes in the same web app page, no switching between the tabs is needed:
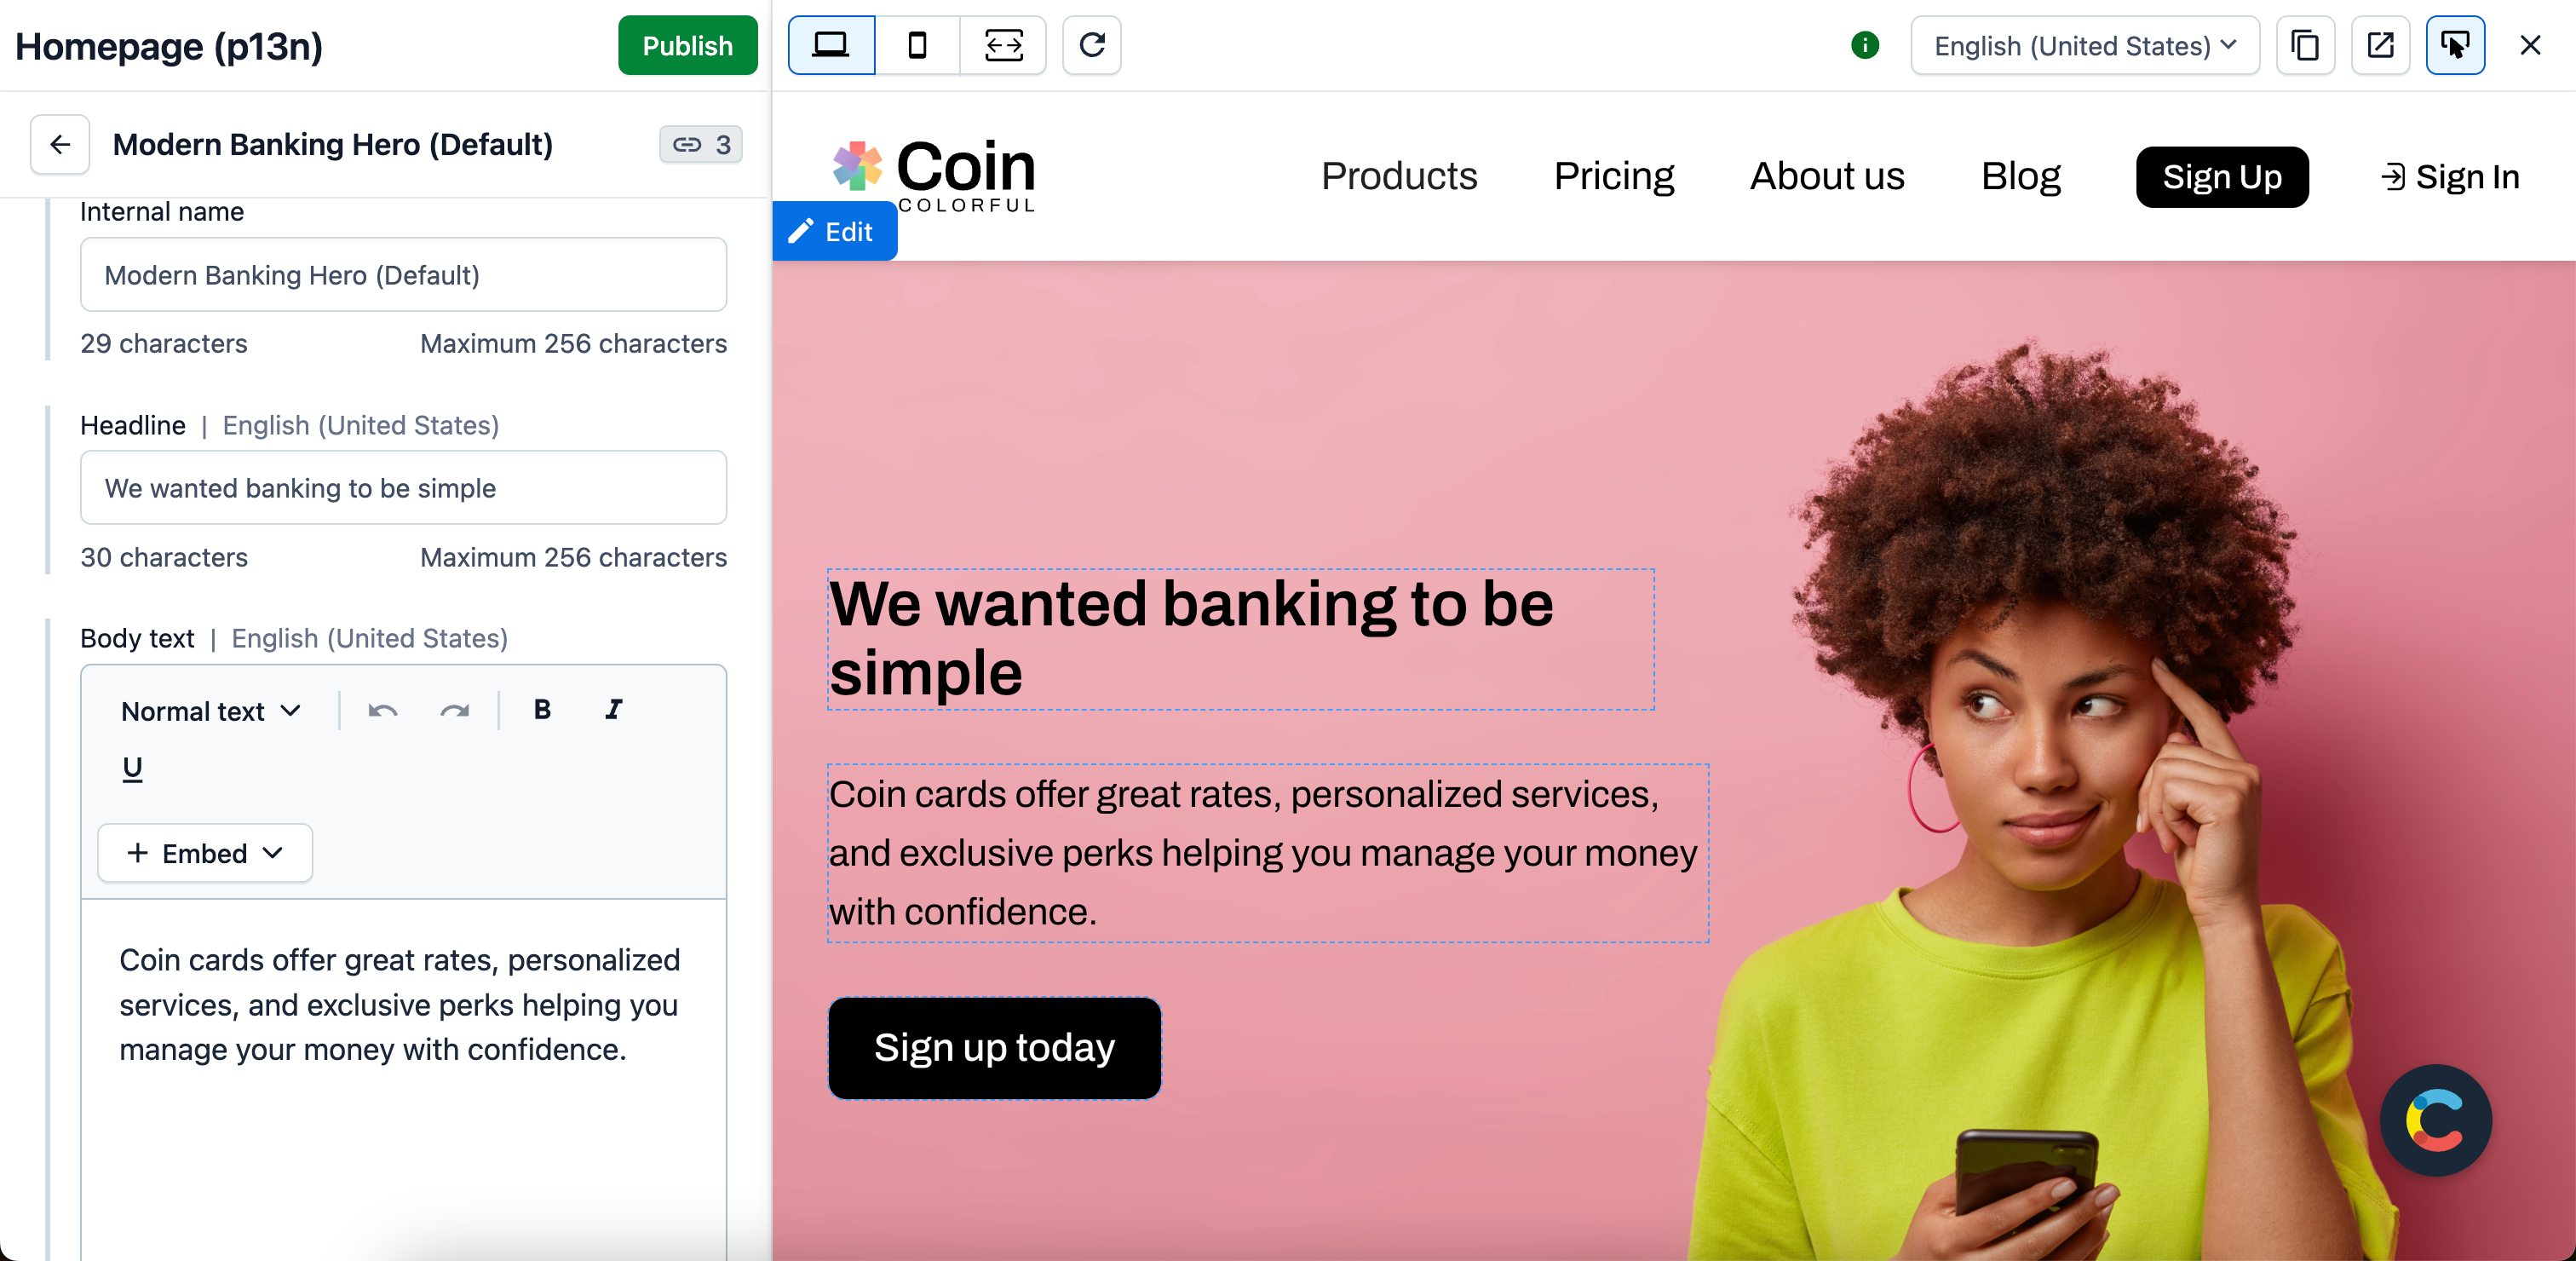
- Live updates — As you edit your entry, the changes are simultaneously displayed in the preview pane, without refreshing the preview:
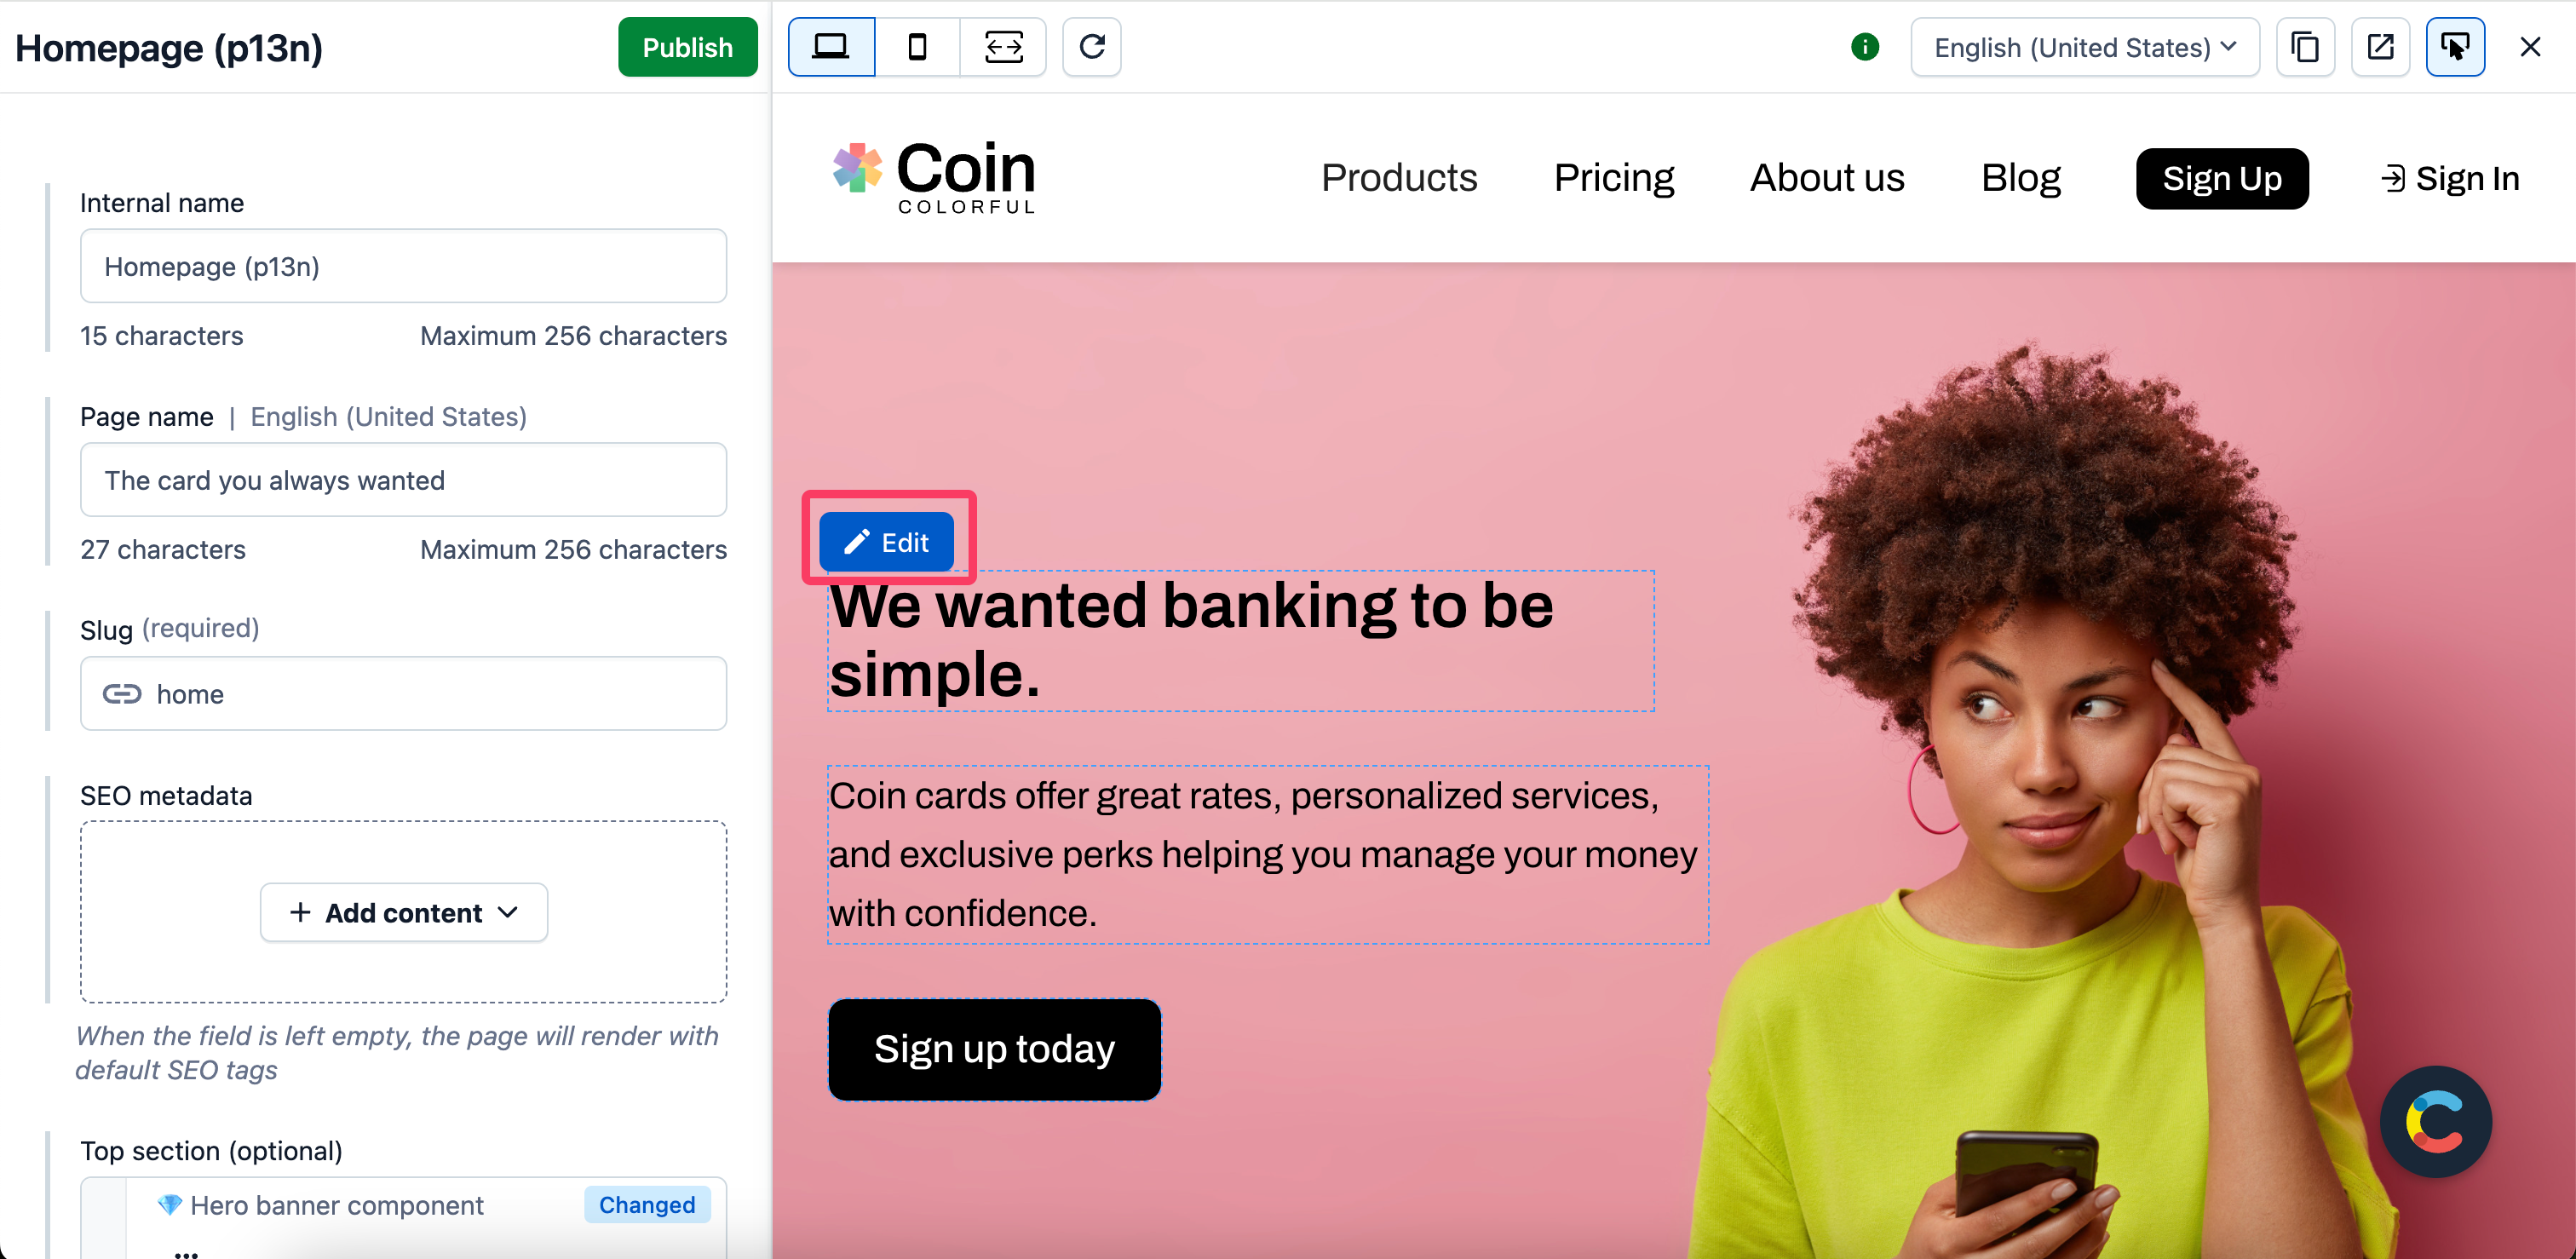
- Inspector mode — Click Edit against a specific piece of website content to quickly jump to its source field and make the necessary changes:
Live preview and custom editor
Both the default entry editor provided by Contentful and any custom entry editor are compatible with live preview. Live preview displays the content of the editor tab that is located left-most in the entry editor. To modify the order of the entry editor tabs, go to the Entry editors tab of the relevant content type.
Requirements
To be able to use side-by-side previewing and editing, you must set up a content preview, but no code changes are required. To activate live preview advanced features - live updates and inspector mode - it is required to initialize the live preview SDK:
| Feature | Requirement to initialize live preview SDK |
|---|---|
| Side-by-side previewing and editing | No live preview SDK required. |
| Live updates | Live preview SDK required. |
| Inspector mode | Live preview SDK required. |
Set up live preview
To set up live preview:
- Configure Content preview. As a prerequisite for setting up and using live preview, you must configure the preview URL and add it to your Content preview. To learn how to set it up, refer to Content preview.
- Optional: Modify your website security configuration.
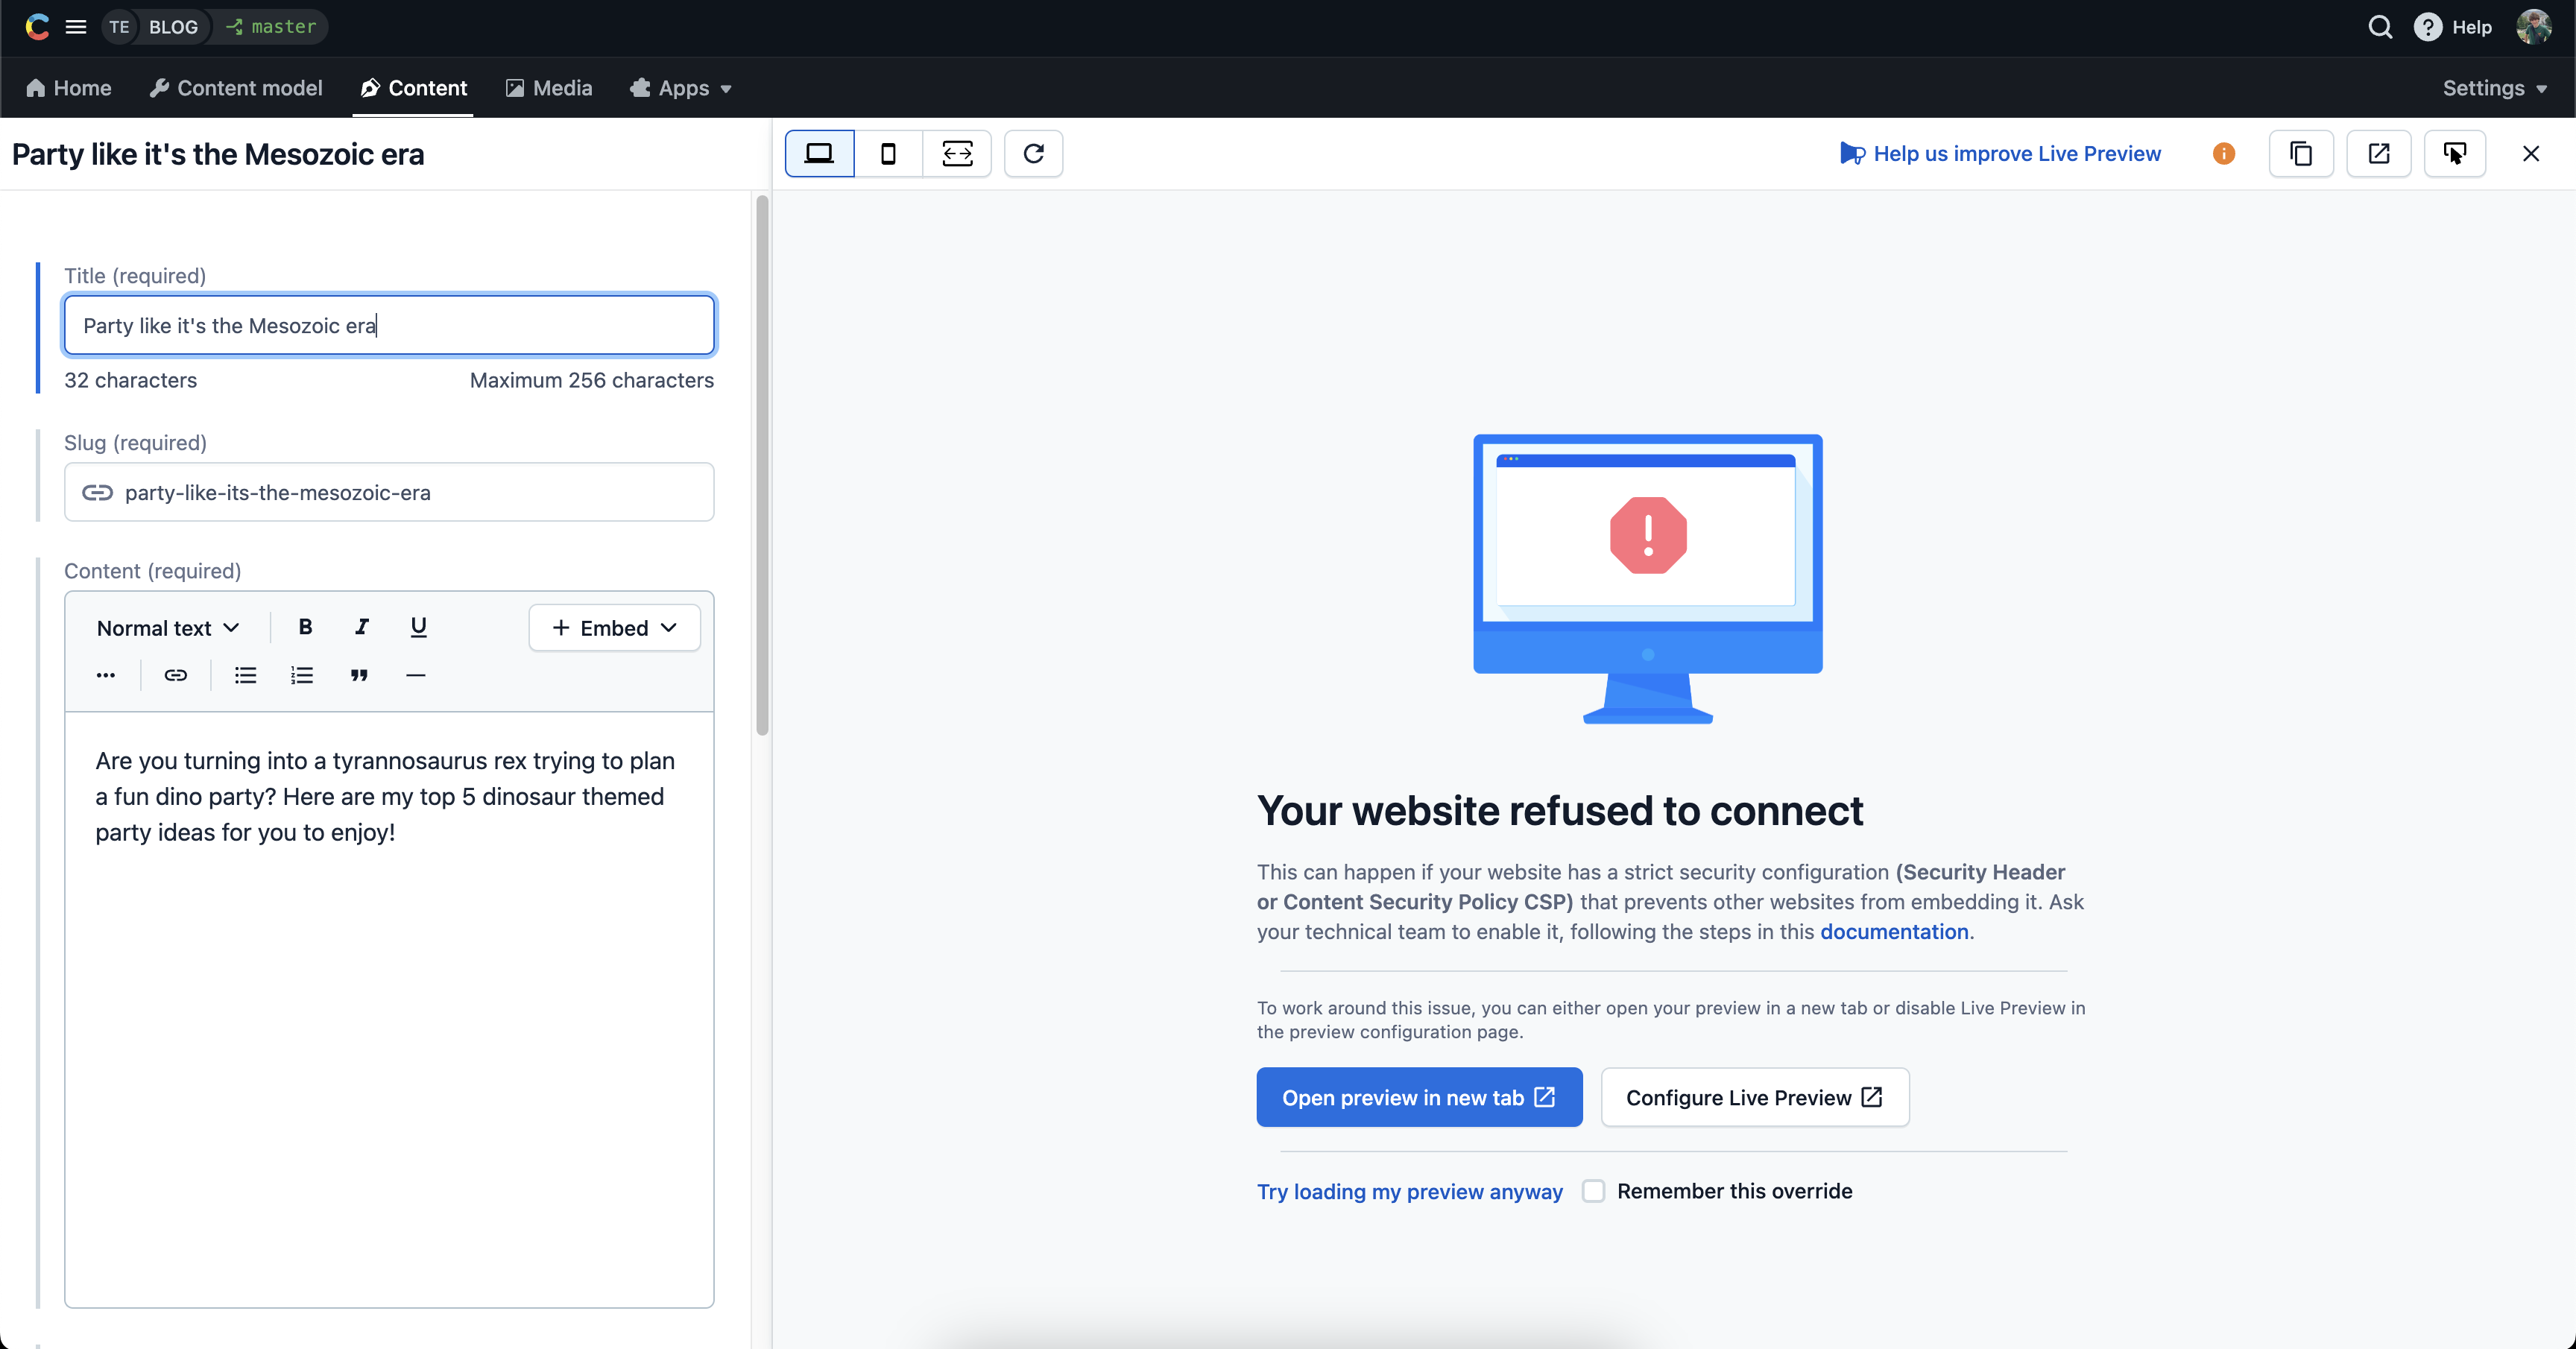
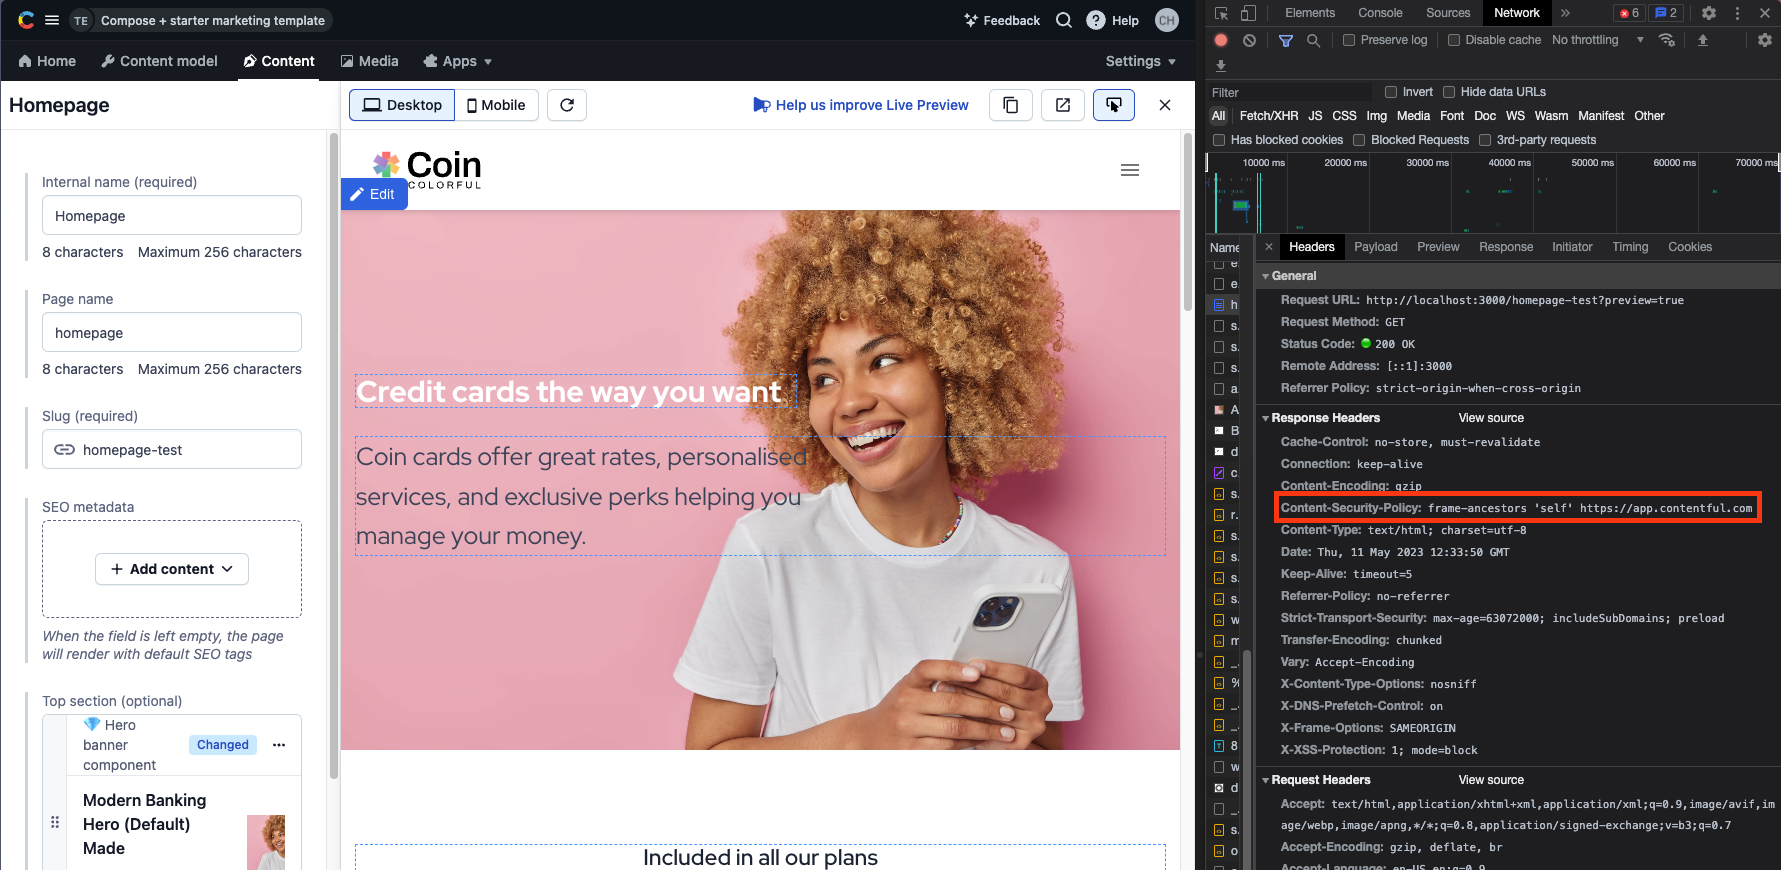
After the preview URL is set up, the live preview pane might display “Refused to connect” message. This can happen if your website has a strict security configuration (Security Header or Content Security Policy (CSP)), which prevents other websites from embedding it. Reach out to your dev or security team to modify your website security configuration for enabling live preview support. To view whether your website security configuration allows live preview support, perform the following steps:
Go to the Network tab of your browser console.
Search for the required page.
Under the Headers subtab, go to the Response Headers.
Check whether the security configuration is set according to one of the following options:
- the X-Frame-Options header — If the X-Frame-Options header is set, remove it.
OR
- Content-Security-Policy header must include
frame-ancestors https://app.contentful.com
Set up advanced live preview features
How live preview SDK works
When a user opens the live preview pane in the entry editor, your preview website is launched inside an iframe. As part of the live preview setup, you embed the live preview SDK in your website's code. When the content is changed, the entry editor sends an event with the updated content to this SDK. The SDK receives the updated content, processes the update, and triggers an update to your preview website. This flow supports both the REST and the GraphQL API of the Content preview API (CPA).
Initialize live preview SDK
To establish communication between your preview website and Contentful, initialize the live preview SDK with the live preview provider.
import { ContentfulLivePreviewProvider } from '@contentful/live-preview/react';

const App = ({ Component, pageProps }) => (
  <ContentfulLivePreviewProvider locale="en-US">
    <Component {...pageProps}>
  </ContentfulLivePreviewProvider>
)
Provider configuration
The ContentfulLivePreviewProvider accepts parameters that allow you to customize your live preview SDK experience. The following options are available:
import { ContentfulLivePreviewProvider } from '@contentful/live-preview/react';

<ContentfulLivePreviewProvider
  locale="set-your-locale-here" // Required: allows you to set the locale once and have it reused throughout the preview.
  enableInspectorMode={false} // Optional: allows you to toggle inspector mode which is on by default.
  enableLiveUpdates={false} // Optional: allows you to toggle live updates which are on by default.
  targetOrigin="https://app.contentful.com" // Optional: allows you to configure the allowed host(s) of live preview (default: ['https://app.contentful.com', 'https://app.eu.contentful.com'])
  debugMode={false} // Optional: allows you to toggle debug mode which is off by default.
>
To optimize non-preview websites, it is advisable to disable live preview functionality by setting both enableInspectorMode and enableLiveUpdates to "false". By doing so, any specific data related to live preview, such as data-attributes, is removed.
Set up live updates
Live updates allow you to preview your changes without clicking the "Refresh preview" button. Whenever content is updated, the changes are immediately displayed in the live preview pane.
To set up live updates with React.js, import the useContentfulLiveUpdates hook and pass the original data to it. The hook then returns the live updated data in real time. See an example in the code snippet below:
sys.id and __typename in your query.
import { useContentfulLiveUpdates } from '@contentful/live-preview/react';
const updatedEntries = useContentfulLiveUpdates(entries);
Set up inspector mode
Inspector mode allows users to locate a field that contains a specific piece of website content with a single click. When you click "Edit" button beside a content block in the preview iframe, you are redirected to the corresponding field within the entry. If the field contains reference to another entry, you are redirected to the referenced entry editor.
To enable inspector mode, tag the corresponding field(s). To tag a field, specify its location within the entry by writing data attributes. The live preview SDK scans for these elements containing the correct field tags.
The required data attributes can be added according to one of the following options:
- Adding the data attributes directly into your code:
data-contentful-field-id
data-contentful-entry-id or data-contentful-asset-id
data-contentful-locale // Optional: override the locale you have defined in the provider- Running the helper function from the live preview SDK:
import { ContentfulLivePreview } from '@contentful/live-preview';

<h1 {...ContentfulLivePreview.getProps({ entryId: id, fieldId: 'title' })}>
  {title}
</h1>;
Inspector mode best practices
We recommend to tag fields as follows:
Tag larger elements — Only tag elements of the page that are significantly larger than the mouse cursor. Tagging smaller elements such as icons inside buttons can result in a very fragmented tagging surface and we recommend to rather only tag the button itself then.
Nested entries — Don't tag pages further than 3 nesting levels. We believe that there is a tipping point where additional tagging of nested entries is not beneficial for the user experience since moving the mouse slightly will potentially show you various "Edit" buttons of different content pieces.
References — Tag the whole referenced entry and the main content inside for faster editing. In case where the text inside is short - for example, the reference is a circle with a one-word text inside — then the recommendation is to refrain from tagging this text.
Website sections — We definitely recommend tagging the sections of a page.
Styling — Many customers manage styling parameters with Contentful, e.g. the background color for a section or the margins around texts. We generally don’t recommend tagging styling as it might result in a confusing user experience, as hover areas intersect to a large extent or fully with the element the styling applies to.
Known issues and limitations
Live updates limitations:
- GraphQL filters (e.g. filters in the Array field type) or filtering using the select query parameter on the Content Preview API (CPA).
- We currently do not support multiple locales within a single GraphQL query or a single CPA response.
- Live updates works only with untransformed data. Ensure that the response from the CPA or GraphQL is provided to the hook in its original form, with any potential transformations applied afterwards.
- Cross-space links are not supported with live preview as Cross-space references resolution is not implemented in the Content Preview API.
My page has an authorization cookie for logging in
To have functional or accessible cookies inside the live preview iframe, configure them with SameSite=None and the Secure flag. This allows your browser to pass them to the iframe.
For example, you want users to log in to the preview website with an authorization cookie. In this case, the cookie is set up as follows:
Set-Cookie: auth=abc123; SameSite=None; Secure