Live preview
What is live preview
Live preview allows users to preview their content in real time in the same page with the entry editor. As changes to the content are made, they are immediately reflected in the preview pane.
Live preview features
Live preview comes with the following features:
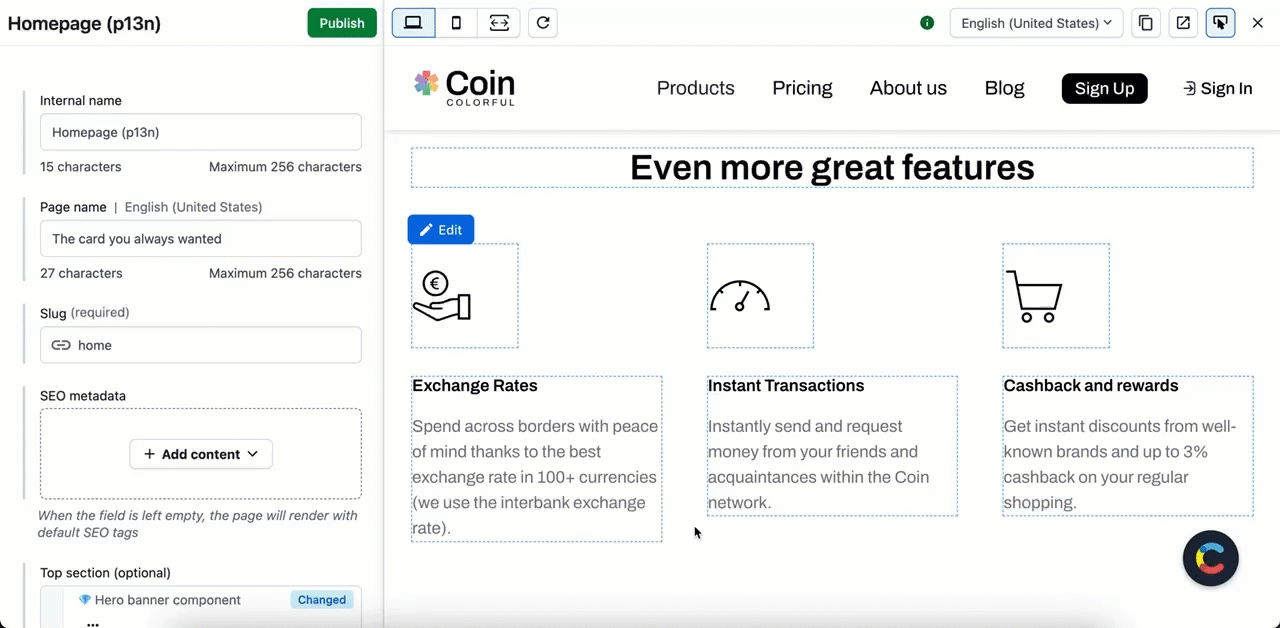
- Side-by-side previewing and editing — Edit your entry and preview changes in the same web app page, no switching between the tabs is needed:
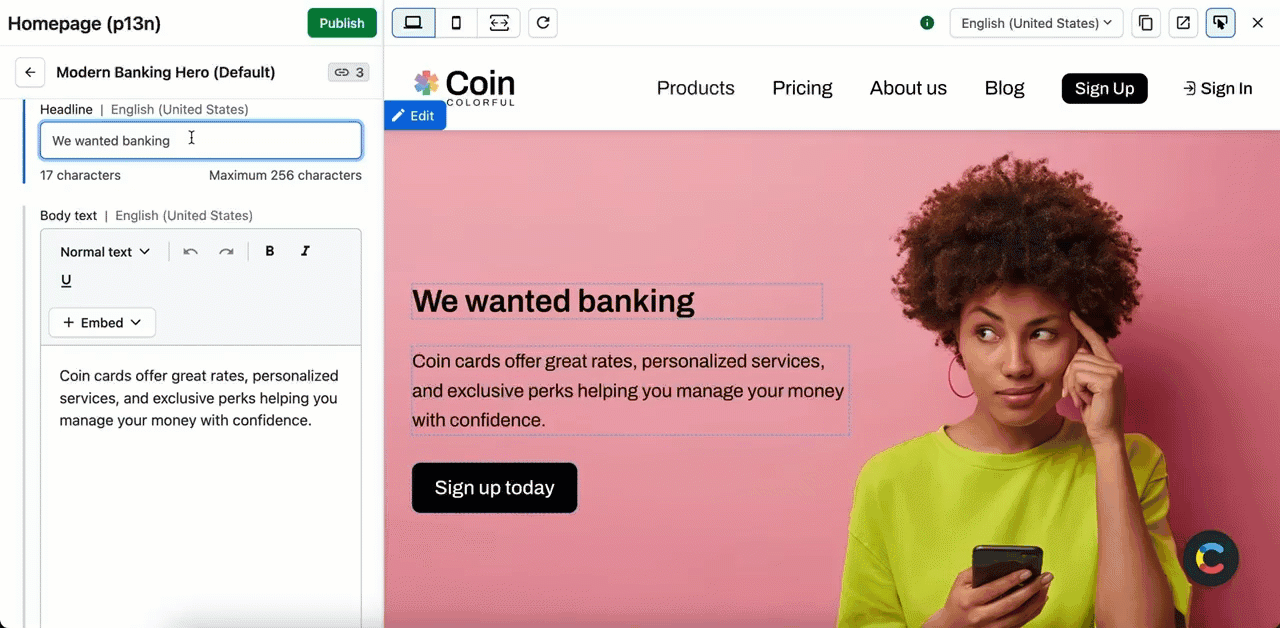
- Live updates — As you edit your entry, the changes are simultaneously displayed in the preview pane, without refreshing the preview:
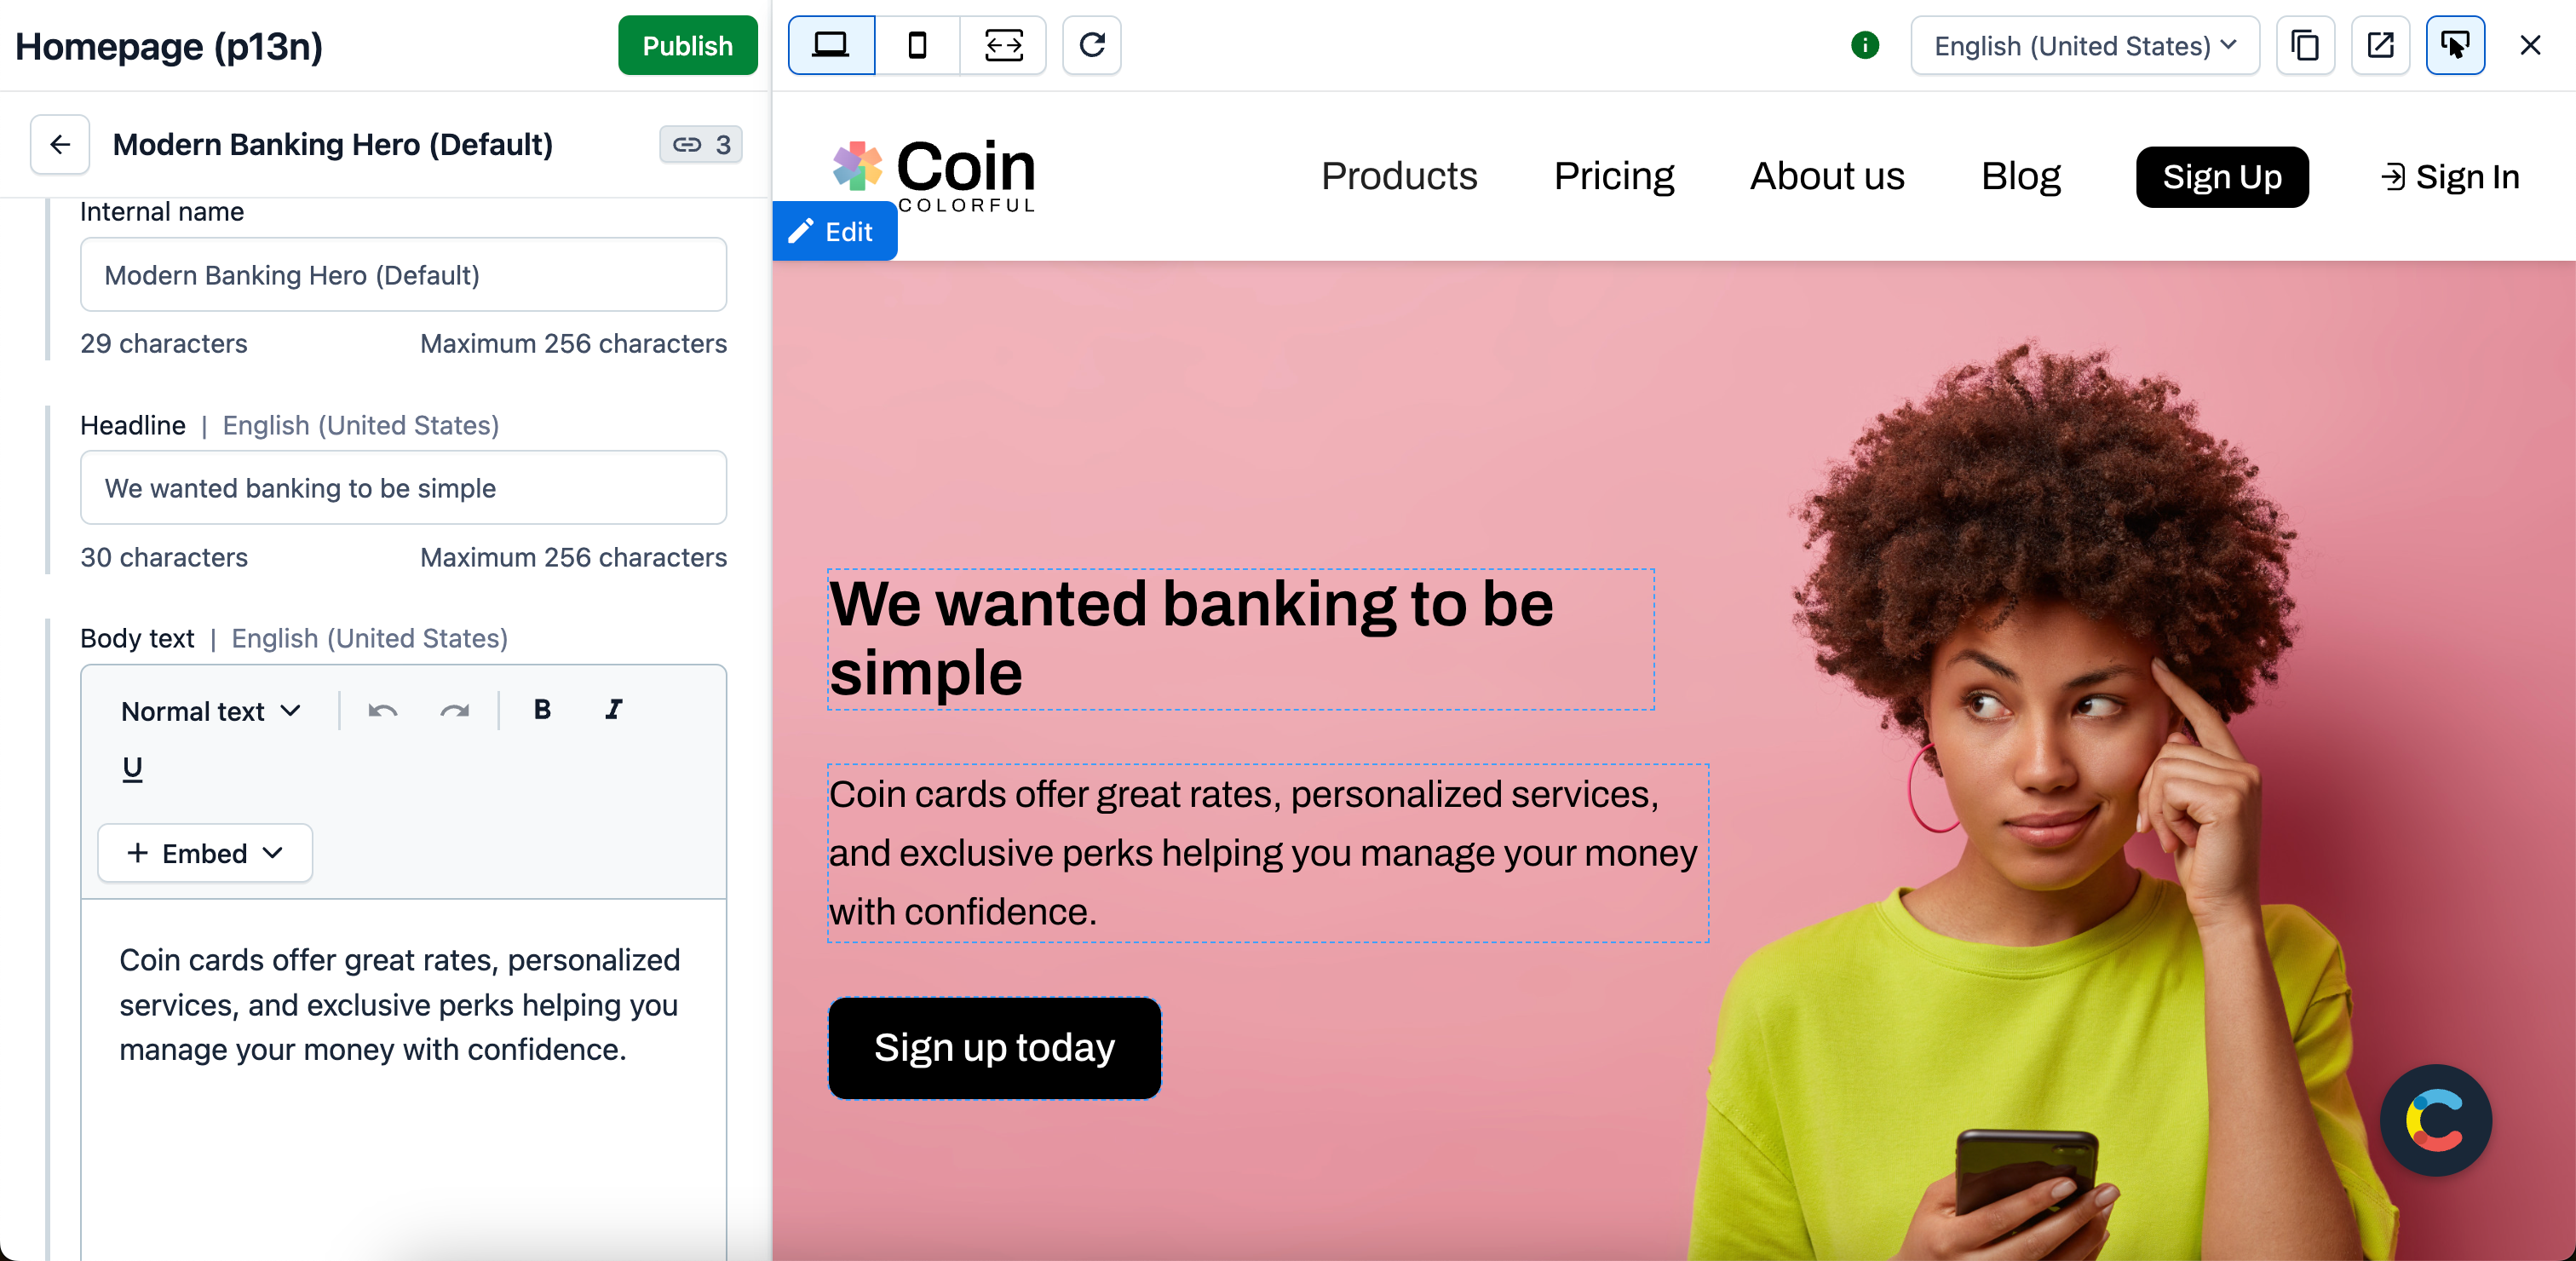
- Inspector mode — Click Edit against a specific piece of website content to quickly jump to its source field and make the necessary changes:
Live preview and custom editor
Both the default entry editor provided by Contentful and any custom entry editor are compatible with live preview. Live preview displays the content of the editor tab that is located left-most in the entry editor. To modify the order of the entry editor tabs, go to the Entry editors tab of the relevant content type.
Requirements
To be able to use side-by-side previewing and editing, you must set up a content preview, but no code changes are required. To activate live preview advanced features - live updates and inspector mode - it is required to initialize the live preview SDK:
Setup
To set up live preview:
-
Configure Content preview. As a prerequisite for setting up and using live preview, you must configure the preview URL and add it to your Content preview. To learn how to set it up, refer to Content preview.
-
Modify your website security configuration.
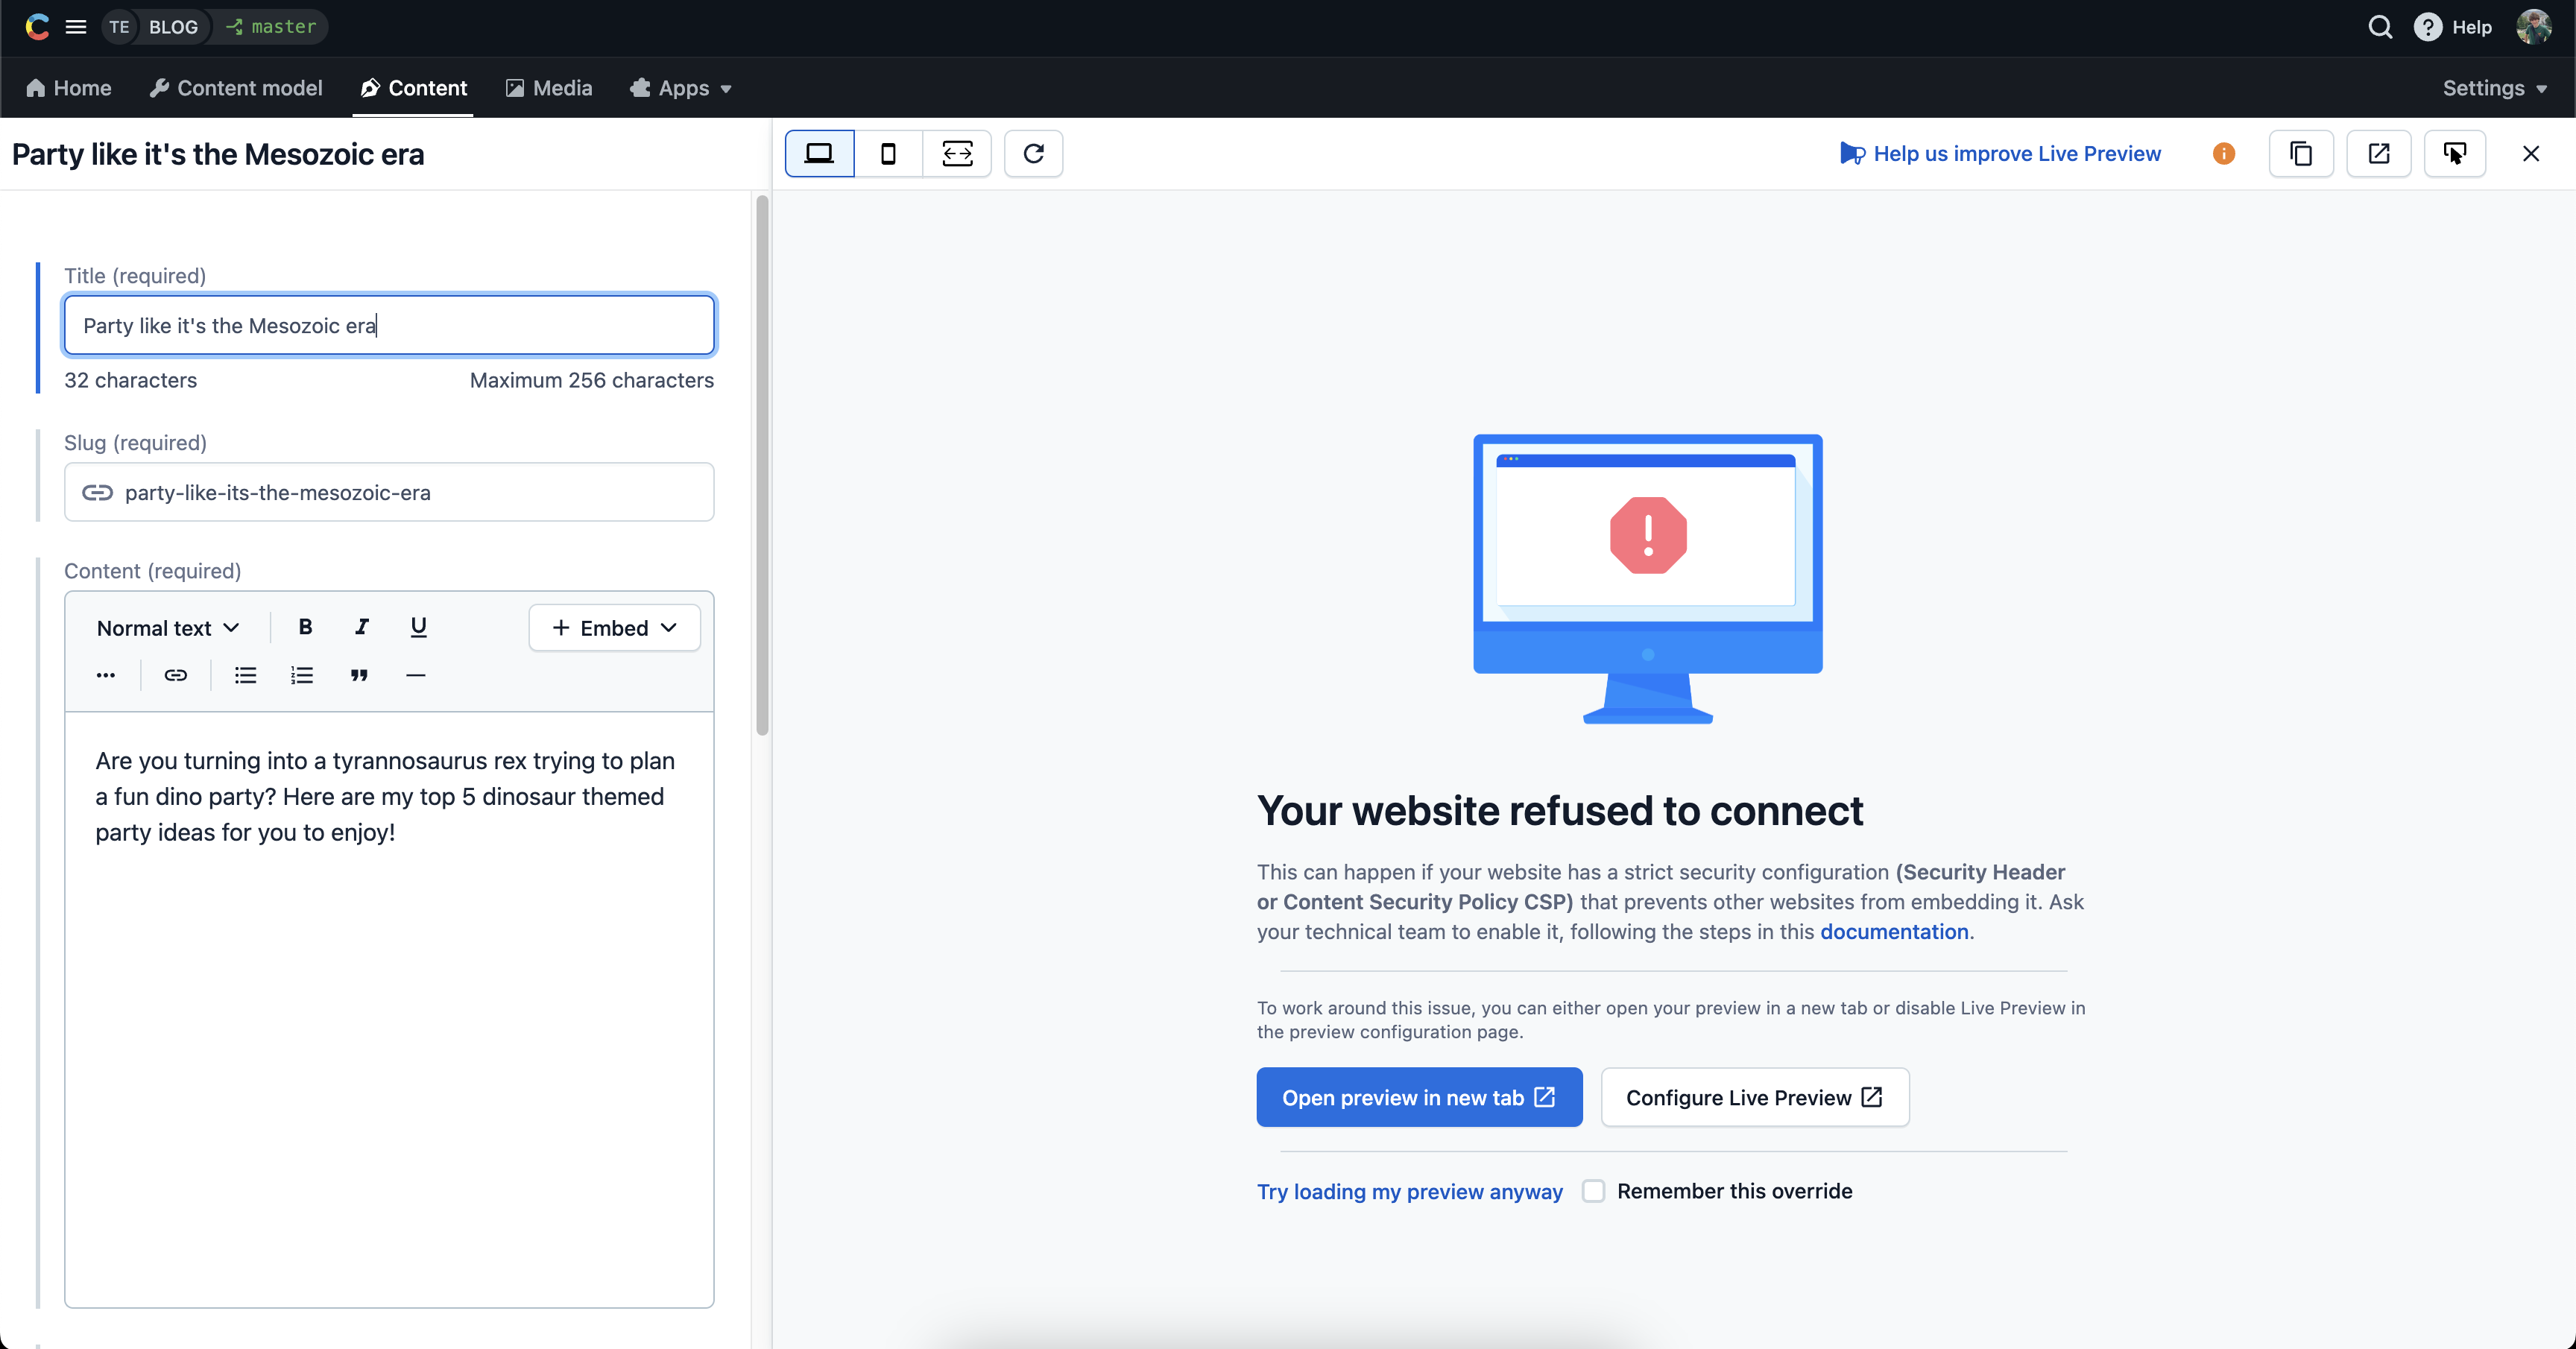
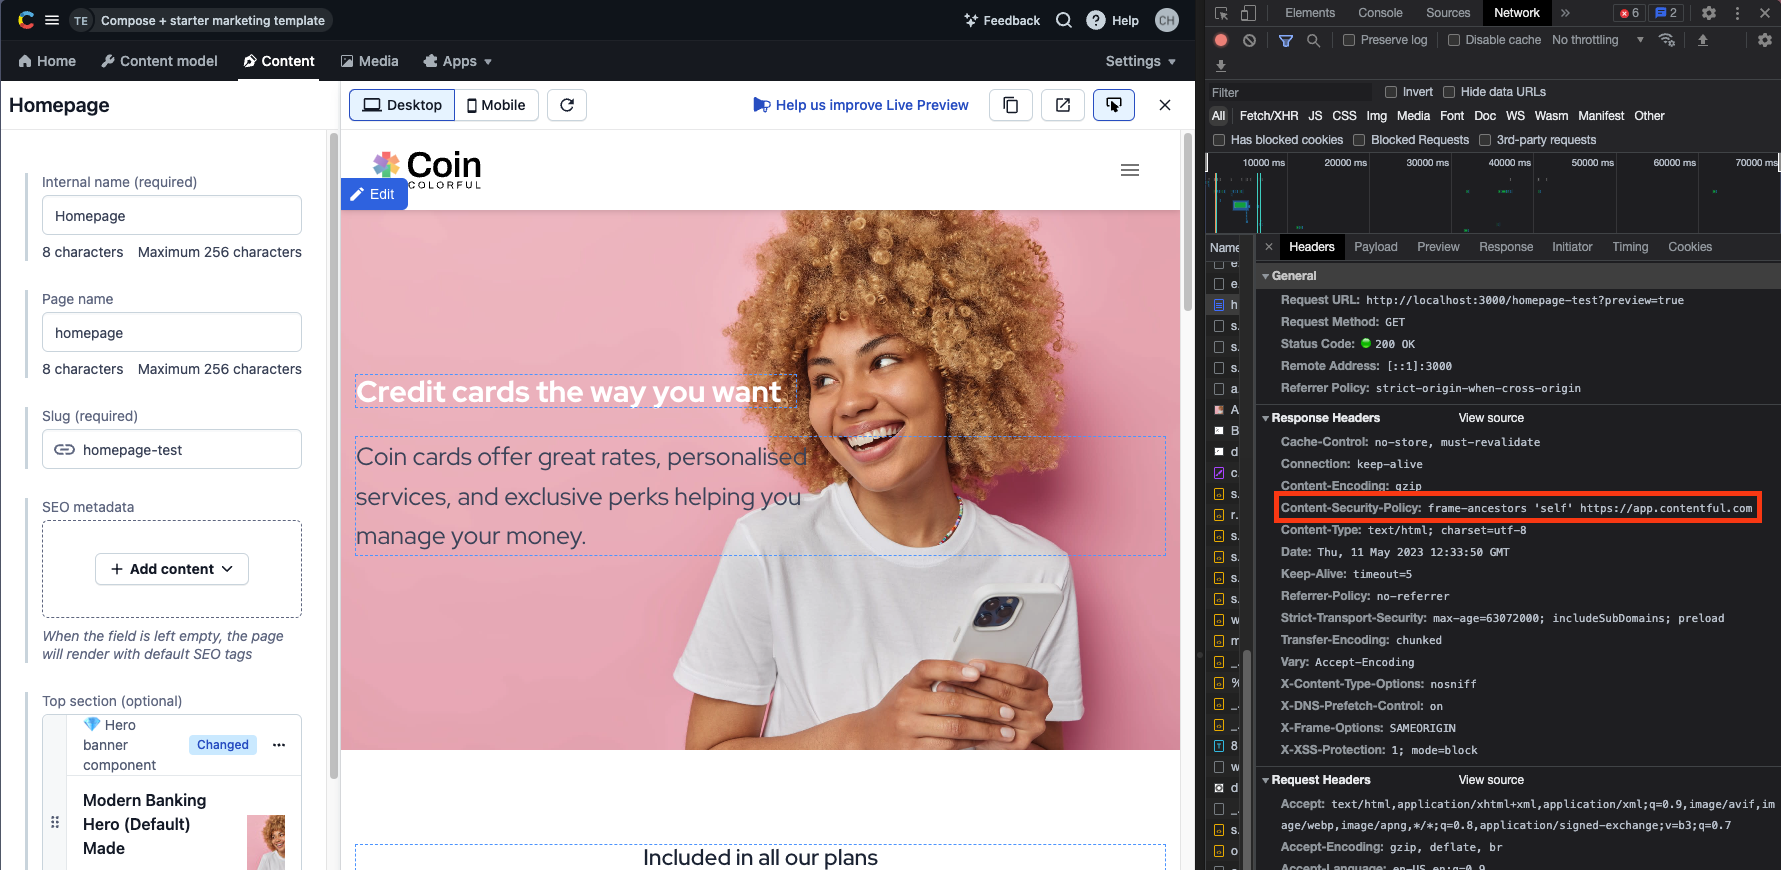
After the preview URL is set up, the live preview pane might display “Refused to connect” message. This can happen if your website has a strict security configuration (Security Header or Content Security Policy (CSP)), which prevents other websites from embedding it. Reach out to your dev or security team to modify your website security configuration for enabling live preview support. To view whether your website security configuration allows live preview support, perform the following steps:
-
Go to the Network tab of your browser console.
-
Search for the required page.
-
Under the Headers subtab, go to the Response Headers.
-
Check whether the security configuration is set according to one of the following options:
- the X-Frame-Options header — If the X-Frame-Options header is set, remove it.
OR
- Content-Security-Policy header must include
frame-ancestors https://app.contentful.com
Known issues and limitations
My page has an authorization cookie for logging in
To have functional or accessible cookies inside the live preview iframe, configure them with SameSite=None and the Secure flag. This allows your browser to pass them to the iframe.
For example, you want users to log in to the preview website with an authorization cookie. In this case, the cookie is set up as follows:
SSO will not work if you do not allow embedding.