> For clean Markdown of any page, append .md to the page URL.
> For a complete documentation index, see https://contentful.com/developers/docs/llms.txt.
> For AI client integration (Claude Code, Cursor, etc.), connect to the MCP server at https://contentful.com/_mcp/server.
# Live preview - Inspector mode
> Learn how to set up Inspector mode in live preview
## Overview
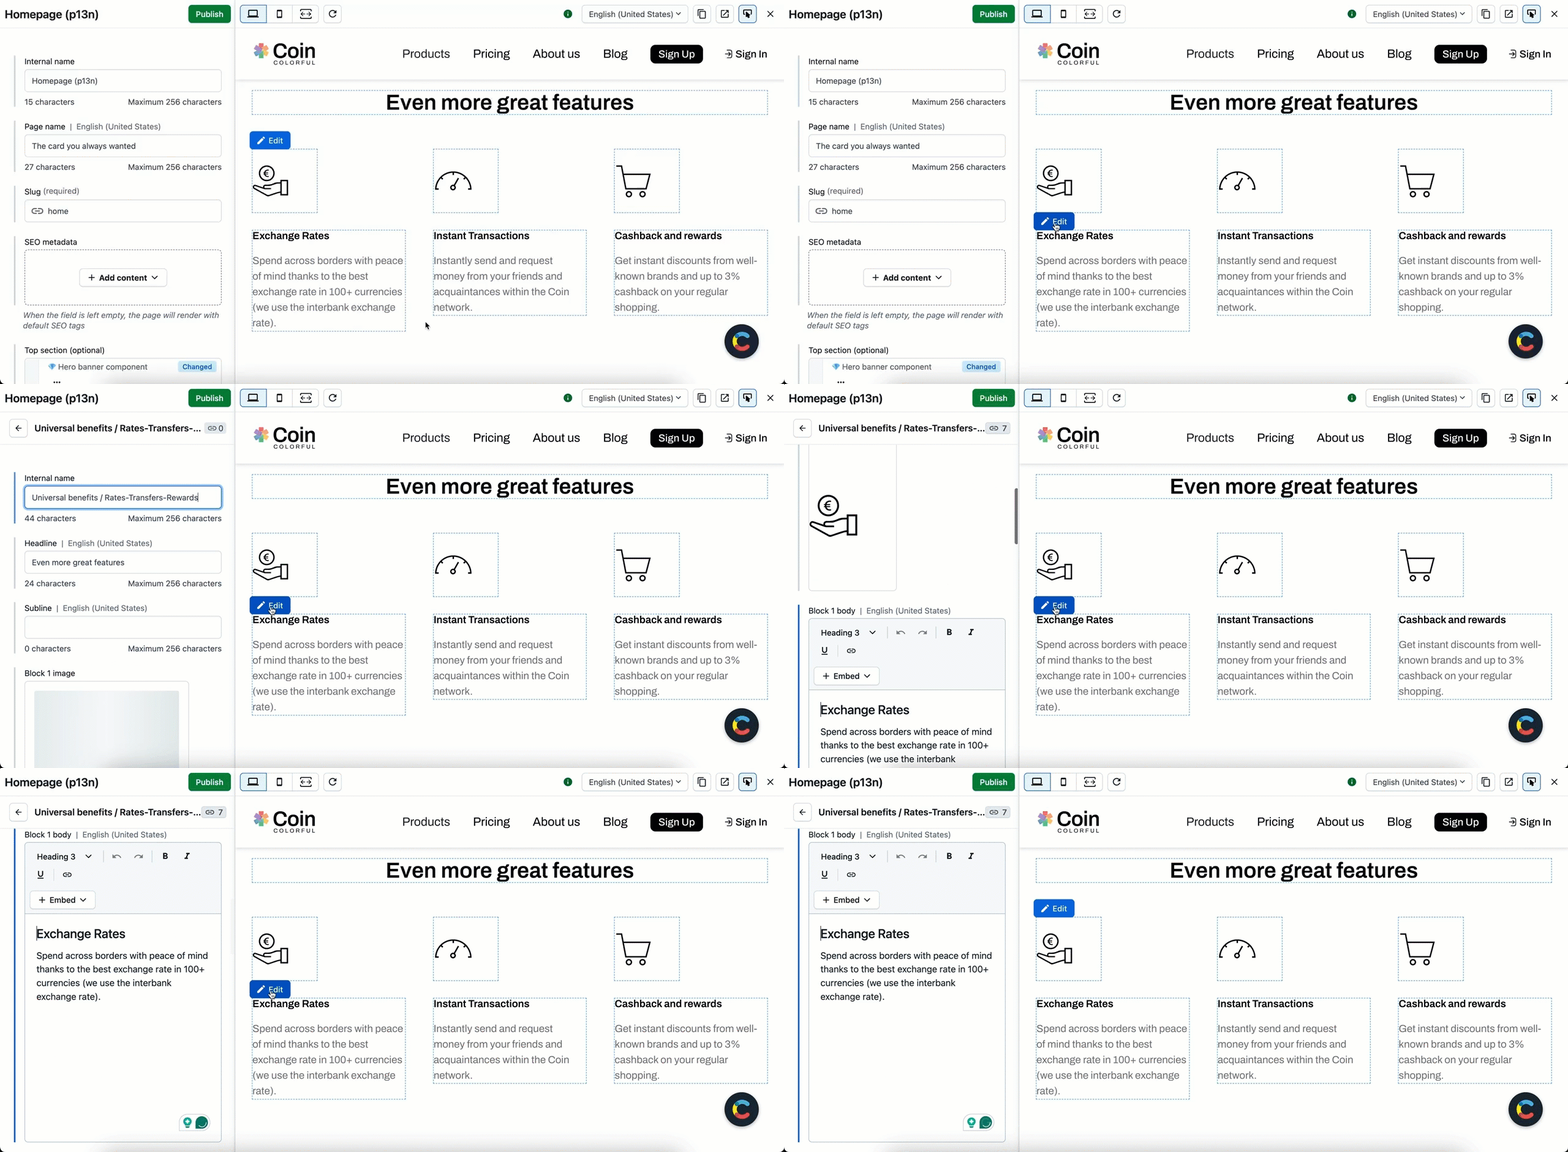
Inspector mode is an advanced [live preview](/tutorials/preview/live-preview) feature that allows you to access an entry that contains a specific piece of website content with one click. When you click the "Edit" button beside a content block in the preview iframe, you are redirected to the corresponding field within the entry. This is particularly helpful when authors share the preview URL with colleagues, as it enables them to access the correct Contentful entry with a single click.
If the field contains reference to another entry, you are redirected to the referenced entry editor.
## Inspector mode setup options
Inspector mode is set up by tagging fields. This tagging can be done according to one of the following options:
* **Recommended: Automatically with [Content Source Maps](#content-source-maps)** - Tagging is done automatically, hidden strings are included as tagging information. Content Source Maps tag text fields, Rich Text fields, and assets.
> **Info**
>
> Content Source Maps are only available on our [Premium plan](https://www.contentful.com/pricing/).
* **[Manually](#manual-tagging)** - corresponding fields are tagged manually by adding data attributes.
> **Info**
>
> We strongly recommend Content Source Maps option since tagging is automated, and the setup is quick - 30 minutes to a day for the most common use cases and content setups. Content Source Maps provide scalability - they also work when new content types are created in the future.
To better understand the difference between the two approaches, view their main characteristics in the table below:
| **Characteristic** | **Content Source Maps (recommended)** | **Manual tagging** |
| ------------------ | ------------------------------------------- | ----------------------------------------- |
| Pricing plan | Premium | All users |
| Supported fields | Text, Rich text, list of Short text, assets | All field types |
| Setup time | 30 minutes to a day | Significantly more time |
| Maintenance | Scales to new content types | Needs to be adapted for new content types |
## Set up inspector mode
> **Info**
>
> To enable inspector mode, it is required to set up [live preview](/tutorials/preview/live-preview) first.
### Content Source Maps
#### How it works
When enabled, our APIs return source maps for certain visual fields that have links to the correct field in Contentful. The Live Preview SDK then transforms these Content Source Maps to hidden metadata into the results of your queries.
This integration employs a method known as steganography, which conceals hidden information within other data. Specifically, this approach embeds the metadata into invisible Unicode characters incorporated into the existing text strings.
The use of these "enhanced strings" on your web pages allows live preview to detect and decipher the concealed metadata in the final HTML. This enables the display of interactive links that guide users directly to the relevant field in Contentful.
#### Supported field types
| Field Type | Status | Notes |
| ---------------------------------------- | ----------------------- | ------------------------------------------------------------ |
| Short text (Symbol) | Supported | Only "Single line" Appearance setting \* |
| Long Text | Supported | Only "Single line" and "Multiple line" Appearance setting \* |
| Rich Text | Supported | Includes embedded references and assets |
| Lists of Short text (Symbol) | Supported | Supports all Appearance settings |
| Title and Description fields in an asset | Supported | Must be used as `alt` attribute for images |
| Custom widgets of supported field types | Supported | Can be tagged with Content Source Maps |
| URL values | Not supported | Adding hidden metadata would cause issues |
| ISO Date values | Not supported | Adding hidden metadata would cause issues |
| Cross-space content | Not currently supported | |
##### \*Unsupported widget appearance settings:
* Dropdown and Radio: Not supported due to their primary use for non-visual text purposes (e.g., CSS styling properties).
* URL and Slug: Not supported as hidden metadata would cause issues.
* Markdown is not supported.
#### Implementation
Content Source Maps can be set up according to one of the following options:
##### GraphQL
1. Install the latest version of the Live Preview SDK.
```javascript
npm install @contentful/live-preview
```
2. Initialize the SDK.
```javascript
import { ContentfulLivePreviewProvider } from
'@contentful/live-preview/react';
const CustomApp = ({ Component, pageProps }) => (
)
```
> **Info**
>
> See also: [Provider configuration](/tutorials/preview/inspector-mode#provider-configuration).
3. Use the query level directive in your GraphQL queries.
> **Info**
>
> Content Source Maps will only be generated for preview content.
Content Source Maps return from our GraphQL API under the "extensions":
```javascript
query @contentSourceMaps { //Add the query level directive
postCollection(preview: true) { //And preview: true
items {
title
}
}
}
// This will return:
{
"data": ...
"extensions": ... //Content Source Maps will be here
}
```
4. Use the `encodeGraphQLResponse` function from the Live Preview SDK by passing it the GraphQL Response with Content Source Maps. It will return with your content that includes the hidden metadata to enable inspector mode.
```javascript
import { encodeGraphQLResponse } from "@contentful/live-preview";
const dataWithAutoTagging = encodeGraphQLResponse(data);
```
##### Content Preview API (CPA)
* With Contentful.js SDK (recommended):
1. Initialize the Live Preview SDK
```javascript
import { ContentfulLivePreviewProvider } from
'@contentful/live-preview/react';
const CustomApp = ({ Component, pageProps }) => (
)
```
> **Info**
>
> See also: [Provider configuration](/tutorials/preview/inspector-mode#provider-configuration).
2. Enable Content Source Maps using the [Contentful Client SDK](https://github.com/contentful/contentful.js), by setting
`includeContentSourceMaps` in the client to `true`:
```javascript
export const clientPreview = createClient({
space: process.env.CONTENTFUL_SPACE_ID!,
accessToken: process.env.CONTENTFUL_PREVIEW_ACCESS_TOKEN!,
host: "preview.contentful.com",
includeContentSourceMaps: true
});
```
* Without Contentful.js SDK:
1. Initialize the Live Preview SDK
```javascript
import { ContentfulLivePreviewProvider } from
'@contentful/live-preview/react';
const CustomApp = ({ Component, pageProps }) => (
)
```
> **Info**
>
> See also: [Provider configuration](/tutorials/preview/inspector-mode#provider-configuration).
2. Directly access the Contentful CPA without using the Contentful.js SDK.
Please be aware that without the [Contentful Client SDK](https://github.com/contentful/contentful.js), certain protections, such as automatically requesting the `sys.id`, are not enforced. To ensure Content Source Maps function properly, the complete `sys` object needs to be retrieved. Therefore, using a [select operator](/references/content-preview-api/overview) to exclude this from the response would cause errors.
3. Add `&includeContentSourceMaps=true` to the URL:
```javascript
fetch("https://preview.contentful.com/spaces/:spaceId/environments/:e nvId/entries&includeContentSourceMaps=true",
{
method: "GET",
headers: {
Authorization: "Bearer YOUR_ACCESS_TOKEN",
Content-Type: "application/json",
},
} )
```
4. Use the `encodeCPAResponse` function from the Live Preview SDK by passing it the CPA Response with Content Source Maps. It will return with your content that includes the hidden metadata to enable inspector mode.
```javascript
import { encodeCPAResponse } from "@contentful/live-preview";
const dataWithAutoTagging = encodeCPAResponse(data);
```
#### Verifying Content Source Maps in API Responses
To verify that Content Source Maps are being returned correctly by our APIs, look for specific fields in the API response. The APIs provide raw Content Source Maps, which the Contentful.js SDK or Live Preview SDK transforms into hidden characters embedded within your content. These hidden characters enable inspector mode functionality.
##### GraphQL
When using the GraphQL API, ensure that you add the query-level directive `@contentSourceMaps` to the query. Additionally, preview content should be requested by setting the `preview: true` argument. Content Source Maps will appear under the `extensions` object of the response.
Example of GraphQL Response:
```json
{
"data": {
"post": {
"title": "Title of the post",
"subtitle": "Subtitle of the post"
}
},
"extensions": {
"contentSourceMaps": {
"version": 1.0,
"spaces": ["foo"],
"environments": ["master"],
"fields": ["title", "subtitle"],
"locales": ["en-US"],
"entries": [{ "space": 0, "environment": 0, "id": "a1b2c3" }],
"assets": [],
"mappings": {
"/data/post/title": {
"source": {
"entry": 0,
"field": 0,
"locale": 0
}
},
"/data/post/subtitle": {
"source": {
"entry": 0,
"field": 1,
"locale": 0
}
}
}
}
}
}
```
##### Content Preview API (CPA)
When querying the Content Preview API (CPA), verify the presence of `contentSourceMapsLookup` and `contentSourceMaps` fields within the `sys` object in the response.
Example of CPA Response:
```json
{
"sys": {
"id": "3cmDYq19b7cY5FBsAETyTu",
"type": "Entry",
"contentSourceMapsLookup": {
"sys": {
"type": "ContentSourceMapsLookup"
},
"fieldTypes": ["symbol"],
"editorInterfaces": [
{
"widgetId": "singleLine",
"widgetNamespace": "builtin"
}
]
},
"contentSourceMaps": {
"sys": {
"type": "ContentSourceMaps"
},
"mappings": {
"/fields/title": {
"source": {
"fieldType": 0,
"editorInterface": 0
}
}
}
}
},
"fields": {
"title": {
"en-US": "hello en-US",
"de": "hallo de"
}
}
}
```
#### Combining Live Updates & Content Source Maps
> **Info**
>
> If you're using live updates and inspector mode together with Content Source Maps, pass the encoded result into `useContentfulLiveUpdates`.
```jsx
import { encodeGraphQLResponse } from '@contentful/live-preview';
import { useContentfulLiveUpdates } from '@contentful/live-preview/react';
export default function Page({ initialGraphQLResponse }) {
// 1. Encode the full response first (including extensions):
const encoded = encodeGraphQLResponse(initialGraphQLResponse);
// 2. Then pass that encoded data to the live updates hook:
const updated = useContentfulLiveUpdates(encoded);
return {updated.data?.myEntry?.title}
;
}
```
#### Troubleshooting and tips
We've taken a cautious approach in determining which fields to generate Content Source Maps for, ensuring that it won't disrupt your website. The remaining potential issues might include the following:
* Under certain circumstances, such as when applying letter-spacing in CSS, fields may display styles that weren't intended. Additionally, strict string comparisons can fail now that hidden metadata is appended to the values. In these cases, you can utilize the functions provided by the Live Preview SDK to retrieve the content and remove any hidden metadata.
```javascript
import { splitEncoding } from "@contentful/live-preview";
const { cleaned, encoded } = splitEncoding(text);
```
#### Known issues and limitations
* Adding hidden metadata to content can result in problems, e.g. when being used for CSS values, for dates or URL content. You can remove the hidden strings using the `splitEncoding` function from the Live Preview SDK.
* Encoding is skipped on the following formats:
* Any date format that does not use English letters (e.g. 4/30/24);
* ISO dates (e.g. 2024-04-30T12:34:59Z);
* URLs.
* We intentionally avoid tagging certain widgets, such as dropdowns, because they are primarily used for non-visual text purposes, such as CSS styling properties (e.g. #f4f4f4 color code). Adding hidden strings to these fields could potentially cause issues.
* We do not support [Gatsby](https://www.gatsbyjs.com/) with the [gatsby-source-contentful](https://www.gatsbyjs.com/plugins/gatsby-source-contentful/) plugin, since it uses the [Sync API](/concepts/sync) under the hood. Content Source Maps currently only get generated for the CPA and GraphQL API.
### Manual tagging
#### Implementation with Vanilla JS and React
1. Initialize the [live preview SDK](https://github.com/contentful/live-preview) with the live preview provider.
#### Vanilla JS
```javascript
import { ContentfulLivePreview } from '@contentful/live-preview';
ContentfulLivePreview.init({
locale: 'en-US', // This is required and allows you to set the locale once and have it reused throughout the preview
enableInspectorMode: false, // This allows you to toggle the inspector mode which is on by default
enableLiveUpdates: false, // This allows you to toggle the live updates which is on by default
debugMode: false, // This allows you to toggle the debug mode which is off by default
targetOrigin: 'https://app.contentful.com', // This allows you to configure the allowed host of the live preview (default: ['https://app.contentful.com', 'https://app.eu.contentful.com'])
});
```
#### React
```typescript
import { ContentfulLivePreviewProvider } from "@contentful/live-preview/react";
const App = ({ Component, pageProps }) => (
);
```
> **Info**
>
> See also: [Provider configuration](/tutorials/preview/inspector-mode#provider-configuration).
2. Tag the corresponding field(s). To tag a field, specify its location within the entry by writing data attributes. The live preview SDK scans for these elements containing the correct field tags.
> **Info**
>
> The manual tagging only works with fields that have the correct data attributes. Fields without these data attributes aren't seen as tagged and don't work with this feature.
The required data attributes can be added according to one of the following options:
* **HTML**: tag fields by adding certain data attributes to HTML elements:
```javascript
```
* **Vanilla JS/React** We have some helper utilities for different frameworks to make this process easier. These helper utilities will help the user add the data attributes to the HTML elements:
#### Vanilla JS
```javascript
import { ContentfulLivePreview } from '@contentful/live-preview';
{title}
;
```
#### React
```typescript
import { useContentfulInspectorMode } from '@contentful/live-preview/react';
export default function BlogPost ({ post }) {
const inspectorProps = useContentfulInspectorMode({ entryId: post.sys.id })
return (
)
}
```
#### Implementation with Next.js app router
1. Create a Next.js client component where you initialize the `ContentfulLivePreviewProvider` from the SDK.
```javascript
"use client";
import { ContentfulLivePreviewInitConfig } from "@contentful/live-preview";
import { ContentfulLivePreviewProvider } from "@contentful/live-preview/react";
import { PropsWithChildren } from "react";
export function ContentfulPreviewProvider({
children,
...props
}: PropsWithChildren) {
return (
{children}
);
}
```
Once the provider is set up in the client component, you can wrap your server component app with it:
```javascript
import { ContentfulPreviewProvider } from "../components/contentful-preview-provider";
export default function Home() {
const { isEnabled } = draftMode();
return (
...
);
}
```
For a full example visit the [examples directory](https://github.com/contentful/live-preview/tree/main/examples) on Github.
> **Info**
>
> See also: [Provider configuration](/tutorials/preview/inspector-mode#provider-configuration).
2. We have a helper utility to make the process of manually tagging fields easier. This helper utility will help you to add the data attributes to the HTML elements:
```typescript
import { useContentfulInspectorMode } from '@contentful/live-preview/react';
export default function BlogPost ({ post }) {
const inspectorProps = useContentfulInspectorMode({ entryId: post.sys.id })
return (
)
}
```
#### Tag cross-space content
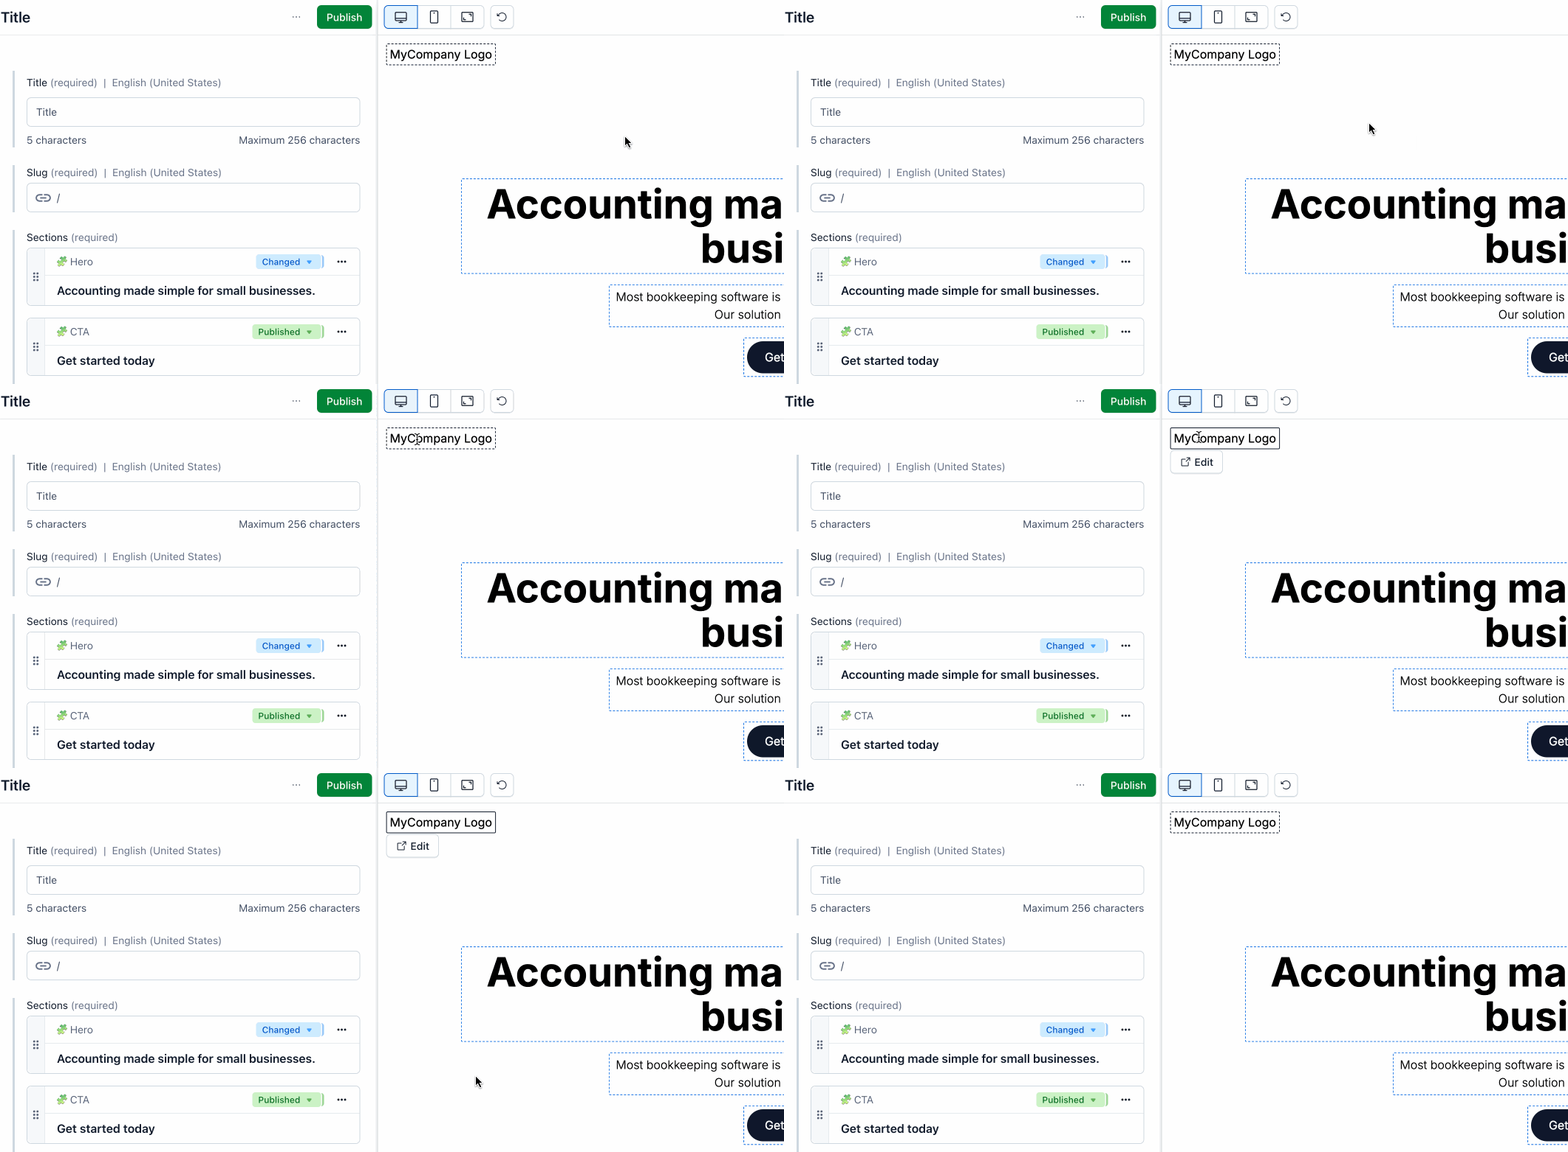
To tag cross-space content, add `data-contentful-space` and `data-contentful-environment` as additional data attributes to the fields you want to tag. Cross-space content will be shown as gray boxes in inspector mode instead of blue. The entry opens in a new tab where you can make changes to it.
#### Vanilla JS
```js
import { ContentfulLivePreview } from '@contentful/live-preview';
{title}
;
```
#### React
```ts
import { useContentfulInspectorMode } from '@contentful/live-preview/react';
export default function BlogPost: ({ blogPost }) {
const inspectorProps = useContentfulInspectorMode({ entryId: blogPost.sys.id })
return (
{blogPost.fields.heading}
)
}
```
#### Provider configuration
The `ContentfulLivePreviewProvider` accepts parameters that allow you to customize your live preview SDK experience. The following options are available:
```jsx
import { ContentfulLivePreviewProvider } from '@contentful/live-preview/react';
```
To optimize non-preview websites, it is advisable to disable live preview functionality by setting both `enableInspectorMode` and `enableLiveUpdates` to "false". By doing so, any specific data related to live preview, such as data-attributes, is removed.
#### Best practices
We recommend to tag fields as follows:
* **Tag larger elements** — Only tag elements of the page that are significantly larger than the mouse cursor. Tagging smaller elements such as icons inside buttons can result in a very fragmented tagging surface and we recommend to rather only tag the button itself then.
* **Nested entries** — Don't tag pages further than 3 nesting levels. We believe that there is a tipping point where additional tagging of nested entries is not beneficial for the user experience since moving the mouse slightly will potentially show you various "Edit" buttons of different content pieces.
* **References** — Tag the whole referenced entry and the main content inside for faster editing. In case where the text inside is short - for example, the reference is a circle with a one-word text inside — then the recommendation is to refrain from tagging this text.
* **Website sections** — We definitely recommend tagging the sections of a page.
* **Styling** — Many customers manage styling parameters with Contentful, e.g. the background color for a section or the margins around texts. We generally don't recommend tagging styling as it might result in a confusing user experience, as hover areas intersect to a large extent or fully with the element the styling applies to.
> Learn how to set up Inspector mode in live preview